Recent Posts

Rajas con Queso

Rajas con Queso

Creamy chilies, onion, and corn make up this traditional Mexican taco.

Berry Smoothie

Berry Smoothie

Choose your favorite fruit & yogurt to use in this delicious smoothie!

French Dessert / Lemonade Pie

French Dessert / Lemonade Pie

This is one of my favorite desserts. It’s rich and creamy like cheesecake, but even quicker to make, especially if you use ready-made crust and frozen whipped topping!

French Dessert

This luscious dessert is so easy to make!
Course Dessert
Cuisine American
Keywords adult-approved, easy, holiday recipes, kid-friendly, quick, sweet, vegetarian
Prep Time 30 minutes
Freeze Time 2 hours
Total Time 2 hours 30 minutes
Servings 18
Calories 210kcal
Author Lynne

Equipment

  • 9×13 pan

Ingredients

Crust

  • 2 sleeves buttery round crackers; about 64 crackers (such as Nabisco Ritz brand)
  • ½ cup margarine or butter, melted
  • ¼ cup powdered sugar

Filling

  • 2 envelopes Dream Whip brand whipped topping mix
  • 1 cup cold milk
  • 1 tsp vanilla
  • 14 oz (1 can) sweetened condensed milk
  • 6 fl oz (½ can) frozen lemonade concentrate, still frozen see note, below

Directions

Crust

  • Using a food processer, blender, or plastic bag, crush the crackers into fine bits.
  • In a bowl, mix together the crushed crackers, powdered sugar, and melted butter.
  • Press cracker crust into the bottom of a 9×13 pan.

Filling

  • Mix the whipped topping mix, milk, and vanilla on low until blended. Then beat on high speed for 4 minutes or until soft peaks form.
  • Add sweetened condensed milk and lemonade concentrate. Mix on medium speed until well blended.
  • Pour into crust. Cover and freeze two hours or overnight.
  • Serve frozen. Store leftovers in freezer.

Notes

Most cans of frozen lemonade concentrate are 12 oz, so you’ll need to use only half that.
Try using vanilla wafers, gingersnaps, or Oreos instead of Ritz crackers for the crust.
Pink frozen lemonade and/or food coloring can add a festive color to the pies!

Lemonade Pie

A quick version of French Dessert
Course Dessert
Cuisine American
Keywords adult-approved, easy, holiday recipes, kid-friendly, quick, vegetarian
Prep Time 15 minutes
Cook Time 2 hours
Total Time 2 hours 15 minutes
Servings 10
Calories 373kcal
Author Lynne

Ingredients

  • 4 cups frozen whipped topping, slightly thawed see note, below
  • 6 fl oz (½ can) frozen lemonade concentrate, still frozen  see note, below
  • 14 oz (1 can) sweetened condensed milk
  • 1 (10 inch) ready-made graham cracker pie crust

Directions

  • Mix whipped topping, frozen lemonade, and sweetened condensed milk until well blended.
  • Pour into pie shell, cover, and freeze 2 hours or overnight. Serve frozen; return leftovers to freezer.

Notes

For reference, most frozen whipped topping tubs are 8 oz or 16 oz; the amount needed for this recipe is about 11 oz.
Most cans of frozen lemonade concentrate are 12 oz, so you’ll need to use only half that.
Try using vanilla wafer, gingersnap, or chocolate cookie crusts.
Pink frozen lemonade and/or food coloring can add a festive color to the pies!
Bunny Cake

Bunny Cake

Turn an ordinary round cake into a bunny shape!

Watergate Salad / Pistachio Salad / Pistachio Fluff

Watergate Salad / Pistachio Salad / Pistachio Fluff

Making Great-Aunt Effie’s Sugar Cookies got me thinking about other childhood treats I haven’t had in decades, such as two favorites always served at Easter.

We always celebrated Easter with my mom’s side of the family. After a big dinner, we’d play Aggravation with Grandma Dean, who took great pleasure in delaying her own chances of winning in order to hunt us down and send us back to “start.” Show no mercy and take no prisoners—that was her philosophy.

But I digress.

My aunt and Mom always put on a big spread; ham or fried chicken or roast beef, mashed potatoes & gravy, home-baked rolls, sweet corn from the prior year’s garden…at least that’s how I remember their meals. What I do know for certain is that no Easter dinner went without my aunt’s two specialties: pistachio salad and a bunny-shaped cake.

I hadn’t had Aunt Frances’ pistachio salad and bunny cake in close to thirty years. After Grandma died and my siblings and cousins started their own families, our Easter get-togethers petered out. Mom never made that delicious green fluff, and though I’ve made similar salads, I never made Aunt Frances’.

Until now.

A quick internet search readily brought up the recipe. Turns out it’s called Watergate Salad and it’s so simple to make I don’t know why I went so long without it!

Thankfully I remembered what gave Aunt Frances’ recipe that crunchy distinctive flavor: black walnuts from her own tree. My black walnuts came from HyVee, but their unique taste transported me back in time nonetheless.

Watergate Salad / Pistachio Fluff

This delicious, easy-to-make salad was a staple at my family's Easter dinners.
Course Dessert, Salad
Cuisine American
Keywords adult-approved, dairy-free, easy, fluff, fruits, gluten-free, holiday recipes, kid-friendly, pineapple, pistachio, pistachio fluff, quick, salad dressing, sweet, vegan, vegetarian, watergate, watergate salad
Prep Time 10 minutes
Total Time 10 minutes
Servings 10
Calories 156kcal
Author Lynne

Ingredients

  • 1 3.4 oz package pistachio instant pudding mix
  • 20 oz can crushed pineapple or pineapple tidbits
  • 1 cup miniature marshmallows
  • ½ cup chopped nuts, such as black walnuts, English walnuts, pecans, or pistachios Optional: Reserve 1 tbl for topping
  • 1 8 oz container non-dairy whipped topping, thawed
  • green food coloring, if desired

Directions

  • Combine all the ingredients in a large bowl, mixing until it's a uniform color of green.
  • For a more intense green, stir in 2 – 3 drops of green food coloring.
  • Transfer salad to a smaller bowl, and if desired, sprinkle top with 1 tbl reserved chopped nuts.
  • Refrigerate until ready to serve.
Irish Shake

Irish Shake

Peppermint extract, vanilla extract, and green food coloring turn an ordinary milkshake into a delicious St. Patrick’s Day treat!

Great-Aunt Effie’s Sugar Cookies

Great-Aunt Effie’s Sugar Cookies

Soft, cake-like texture, tasting of vanilla and nutmeg—these are the sugar cookies of my childhood. The recipe came from my great-aunt, Effie Rachel (Aurand) Vaughn (1886-1967).

Aunt Effie's Sugar Cookies Recipe

She died before I was born, but her sugar cookies were a family favorite. I still have her original hand-written recipe. 😊

Although her recipe says to roll out the dough—to cut into shapes—I don’t remember ever doing that. The dough was too soft and sticky. Instead, we dropped it by spoonfuls onto the cookie sheet.

However, when I made the recipe this time, I was shocked—it was very crumbly. I had to add a bit more milk to get it to stick together! This isn’t at all how I remember the dough. (And I last made the cookies only a couple years ago.)

  • Maybe I put too much flour in, since I just eyeballed the measurements.
  • Maybe I have a slightly different version on another recipe card.
  • Maybe using real butter (which I used this time) instead of margarine (which I typically use) makes a difference.

Who knows? But it gave me an opportunity to actually roll out the dough and cut it into shapes! 😊

Great-Aunt Effie’s Sugar Cookies

Nutmeg is the surprise ingredient in these cake-like sugar cookies.
Course Dessert, Snack
Cuisine American
Keywords adult-approved, cookies, easy, kid-friendly, sweet
Prep Time 30 minutes
Cook Time 10 minutes
Total Time 40 minutes
Servings 24
Calories 110kcal
Author Lynne

Ingredients

  • 3 cups flour
  • 1 cup sugar
  • 2 tsp baking powder
  • 1 scant tsp baking soda
  • ½ tsp salt
  • ½ tsp nutmeg
  • 1 cup butter or margarine
  • 2 large eggs
  • 4 tbl milk
  • 1 tsp vanilla extract

Directions

  • Preheat oven to 375°F / 190°C. Lightly grease a cookie sheet.
  • Stir together dry ingredients. Cut in butter until it forms a crumbly mix.
  • In a separate bowl, beat the eggs, milk, and vanilla. Pour into the dry ingredients and mix well.
  • Roll out dough on floured surface and cut into shapes. Or drop by spoonfuls onto greased cookie sheet.
  • Bake at 375°F / 190°C until lightly browned on bottoms or edges; about 8-10 minutes. Makes about 3-5 dozen cookies, depending on size.

Notes

Add milk if needed to make the dough soft enough to drop by spoonfuls. 
Blarney Stones

Blarney Stones

Peanuts and frosting cover bite-size cake cubes in this Irish treat.

Pound Cake

Pound Cake

Nutmeg and vanilla flavors this dense cake.

Angel Food Cake

Angel Food Cake

My dad’s favorite cake was Angel Food. Now Monte loves it, too, and requested it for his birthday. 😊 I don’t mind using all the egg whites because I can use the yolks to make one of my favorite desserts, Crème brûlée. 😄

Angel Food Cake

This light and airy cake was my dad's favorite.
Course Dessert
Cuisine American
Keywords adult-approved, cake, dairy-free, kid-friendly, sweet, vegetarian
Prep Time 30 minutes
Cook Time 35 minutes
Cooling Time 1 hour
Total Time 2 hours 5 minutes
Servings 14
Calories 129kcal
Author Lynne

Equipment

  • tube cake pan
  • Mixer

Ingredients

  • 1 cup cake flour see note, below
  • ¾ cup confectioners' sugar
  • cups egg whites (takes about 9 or 10 large eggs) see note, below
  • ¼ tsp salt
  • tsp cream of tartar
  • 1 tsp vanilla extract
  • ¼ tsp almond extract
  • 1 cup white sugar

Directions

  • Move oven rack to lower setting. Preheat oven 375°F/191°C. Ensure the tube cake pan is clean and does not have any grease. Ditto the mixing bowl.
  • Stir flour and confectioner's sugar together. Sift twice to ensure there are no lumps and mixture is combined equally. Set aside.
  • Beat egg whites and salt on high until foamy. Add cream of tartar, vanilla, and almond extract, continuing to beat.
  • When soft peaks form that bend over slightly at the tips, slowly pour in the white sugar.
  • When stiff peaks form that keep their shape, reduce mixing speed to low. Add the flour about ¼ cup at a time, continuing to mix until all the flour is incorporated. Turn off mixer and use a spatula to scrap down and mix in any flour sticking to the sides of the bowl.
  • Use the spatula to scrape big dollops of dough into the cake pan. Spread it around evenly,. Swirl a butter knife through the dough to remove any air pockets.
  • Bake for 30 – 35 minutes, or until a toothpick inserted into the cake comes out clean.
  • Invert pan onto a wire rack or flat surface to cool.
  • When cooled, turn cake upright. Use a butter knife to cut between both the outer and inner edge of the cake and the pan. Invert cake onto a plate and push on the bottom of the pan to release the pan's main section. Use the butter knife to cut along the bottom section of pan and the cake. Remove the tube section.

Notes

Don’t have cake flour? Make it yourself:
  1. Measure out 1 cup all-purpose flour.
  2. Remove 2 tablespoons of the flour.
  3. Replace it with 2 tablespoons cornstarch


Don’t toss the egg yolks!
Save the yolks and make Crème Brûlée
 
Have only 6 yolks from making Crème Brûlée? 
Use the following measurements to make a slightly less tall Angel Food Cake:
  1.  ⅔ cup cake flour
  2. ½ cup confectioners’ sugar
  3. 1 cups egg whites
  4. ⅛ tsp salt
  5. 1 tsp cream of tartar
  6. ⅔ tsp vanilla extract
  7. ⅛ tsp almond extract
  8. ⅔ cup white sugar
 
Important!
  1. If there are any bits of yolk in the whites, or any grease in the mixing bowl, the whites will not beat up properly. If the cake pan has any grease, the cake will not rise as well.
  2. If you don’t invert the cake to cool, it may fall slightly.
Hasselback Roasted Potatoes

Hasselback Roasted Potatoes

Dress up baked potatoes with a knife, butter, and your favorite herbs and toppings!

Roasted Cornish Hens

Roasted Cornish Hens

This diminutive poultry makes for an elegant main dish.

Crème Brûlée

Crème Brûlée

Crème brûlée is one of my favorite deserts. Just a handful of simple ingredients combine into a creamy deliciousness. I don’t have a butane burner, so can’t get the sugar crust on top as crunchy as it ought to be, but it’s still amazing to eat. 😋

I’m including three versions of the recipe: the original, one scaled down for two, and one scaled up to have enough leftover egg whites to make a regular-sized angel food cake. (The original 6 egg version leaves enough egg whites for a shorter angel food cake.)

Crème Brûlée

A creamy, vanilla-flavored custard topped with caramelized sugar.
Course Dessert
Cuisine French
Keywords adult-approved, easy, gluten-free, holiday recipes, kid-friendly, sweet, vegetarian
Prep Time 20 minutes
Cook Time 40 minutes
Cooling Time 2 hours
Total Time 3 hours
Servings 6
Calories 272kcal
Author Lynne

Equipment

  • ramekins
  • butane torch

Ingredients

  • 6 large egg yolks see note, below
  • 4 tbl granulated sugar
  • ½ tsp vanilla extract
  • cups heavy cream or half & half
  • 2 tbl granulated sugar

Directions

  • Preheat oven to 375°F/190°C
  • Heat cream in microwave on high until almost boiling, about 5 minutes.
  • While cream is heating, beat egg yolks, 4 tbl sugar, and vanilla in a mixing bowl until thick and creamy.
  • Slowly pour cream into egg mixture, whisking constantly.
  • If presentation of the brûlées is a priority, skim off the foam after whisking. (Foam bubbles will mar the looks of the brûlées, but don't affect flavor.)
  • Pour into 6 one-cup ramekins. Bake in a water bath: Arrange ramekins in a large baking dish and set on oven rack. Pour hot water into the dish; filling about halfway up the outsides of the ramekins.
  • Bake about 30 minutes. To test for doneness, gently shake pan. If the brûlées have a gelatin-like jiggle, they are ready to take out.
  • Remove entire pan from oven, being careful not to spill out the water bath. Let brûlées cool 15 minutes, then place in refrigerator to chill 2 hours or longer.
  • Before serving, sprinkle tops with granulated sugar, shaking each ramekin so sugar covers entire top evenly. Shake off any excess sugar. Use a butane torch to caramelize the tops. Or place under a broiler for a couple minutes, turning often so they caramelize evenly.

Notes

Save the egg whites and use to make Angel Food Cake!

Crème Brûlée For Two

Perfect when you want just enough dessert for two.
Course Dessert
Cuisine French
Keywords adult-approved, easy, gluten-free, holiday recipes, kid-friendly, sweet, vegetarian
Prep Time 20 minutes
Cook Time 40 minutes
Cooling Time 2 hours
Total Time 3 hours
Servings 2
Calories 272kcal
Author Lynne

Equipment

  • ramekins
  • butane torch

Ingredients

  • 2 large egg yolks
  • tbl granulated sugar
  • tsp vanilla extract
  • 3/4 cup + 1½ tbl heavy cream

Directions

  • Preheat oven to 375°F/190°C
  • Heat cream in microwave on high until almost boiling, about 5 minutes.
  • While cream is heating, beat egg yolks, 4 tbl sugar, and vanilla in a mixing bowl until thick and creamy.
  • Slowly pour cream into egg mixture, whisking constantly.
  • If presentation of the brûlées is a priority, skim off the foam after whisking. (Foam bubbles will mar the looks of the brûlées, but don't affect flavor.)
  • Pour into 6 one-cup ramekins. Bake in a water bath: Arrange ramekins in a large baking dish and set on oven rack. Pour hot water into the dish; filling about halfway up the outsides of the ramekins.
  • Bake about 30 minutes. To test for doneness, gently shake pan. If the brûlées have a gelatin-like jiggle, they are ready to take out.
  • Remove entire pan from oven, being careful not to spill out the water bath. Let brûlées cool 15 minutes, then place in refrigerator to chill 2 hours or longer.
  • Before serving, sprinkle tops with granulated sugar, shaking each ramekin so sugar covers entire top evenly. Shake off any excess sugar. Use a butane torch to caramelize the tops. Or place under a broiler for a couple minutes, turning often so they caramelize evenly.

Crème Brûlée for 9

After baking Angel Food Cake, use the leftover yolks for this luscious dessert!
Course Dessert
Cuisine French
Keywords adult-approved, easy, gluten-free, holiday recipes, kid-friendly, sweet, vegetarian
Prep Time 20 minutes
Cook Time 40 minutes
Cooling Time 2 hours
Total Time 3 hours
Servings 9
Calories 272kcal
Author Lynne

Equipment

  • ramekins
  • butane torch

Ingredients

  • 9 large egg yolks See Note, below
  • 6 tbl granulated sugar
  • ¾ tsp vanilla extract
  • cups heavy cream
  • 3 tbl granulated sugar

Directions

  • Preheat oven to 375°F/190°C
  • Heat cream in microwave on high until almost boiling, about 5 minutes.
  • While cream is heating, beat egg yolks, 4 tbl sugar, and vanilla in a mixing bowl until thick and creamy.
  • Slowly pour cream into egg mixture, whisking constantly.
  • If presentation of the brûlées is a priority, skim off the foam after whisking. (Foam bubbles will mar the looks of the brûlées, but don't affect flavor.)
  • Pour into 6 one-cup ramekins. Bake in a water bath: Arrange ramekins in a large baking dish and set on oven rack. Pour hot water into the dish; filling about halfway up the outsides of the ramekins.
  • Bake about 30 minutes. To test for doneness, gently shake pan. If the brûlées have a gelatin-like jiggle, they are ready to take out.
  • Remove entire pan from oven, being careful not to spill out the water bath. Let brûlées cool 15 minutes, then place in refrigerator to chill 2 hours or longer.
  • Before serving, sprinkle tops with granulated sugar, shaking each ramekin so sugar covers entire top evenly. Shake off any excess sugar. Use a butane torch to caramelize the tops. Or place under a broiler for a couple minutes, turning often so they caramelize evenly.

Notes

Save the egg whites and use to make Angel Food Cake!
Slush

Slush

An icy, slushy punch that’s a hit with kids and adults alike!

Quick & Easy Eggnog

Quick & Easy Eggnog

Use a blender to render this non-alcoholic creamy concoction.

Deluxe Eggnog

Deluxe Eggnog

I adapted this recipe from Guide to Gourmet Cooking, halving the ingredients and making the instructions less complex. The trick to making it is heating the egg yolks enough to thicken but not cook (which makes for lumpy eggnog!)

I’m always to impatient to let the mixture chill before drinking some. It tastes fine lukewarm, but is very foamy. Chilling it allows the bubbles to dissipate. I like it both ways–foamy and not foamy. 😊

Deluxe Eggnog

This eggnog takes a bit more time, but is well worth it!
Course Drinks
Cuisine American
Keywords adult-approved, easy, gluten-free, holiday recipes
Prep Time 20 minutes
Cook Time 10 minutes
Servings 10
Calories 152kcal
Author Lynne

Ingredients

  • 1 cups half and half
  • 1 tsp vanilla
  • 3 cups milk, divided
  • 3 large eggs, separated
  • ¾ cup sugar, divided
  • ¼ tsp salt
  • whipped cream
  • nutmeg

Directions

  • In large bowl or pot, stir together half & half, vanilla, and 2 cups of milk. Set aside.
  • Separate eggs, placing the yolks in a large microwavable bowl and the whites in a mixer bowl.
  • Beat egg yolks slightly and add 1 cup of the milk. Mix well. Cook in microwave for 2 minutes on high. Stir, and continue microwaving in 30 second intervals, stirring each time, until the mixture thickens. (Or reaches a temperature of 160°F on a food thermometer.)
    You may need to shorten the time between intervals to avoid cooking the egg, which will result in lumpy eggnog.
  • When the egg custard has thickened, stir in the salt and ½ cup sugar. Stir until the sugar dissolves. Pour into the milk mixture and stir.
  • Meanwhile, beat egg whites until foamy. Add ¼ cup sugar and continue beating until white form soft peaks. Fold into the eggnog mixture, then whip with a wire whisk.
  • Chill in refrigerator 3 hours. To serve, pour into a serving bowl, dot with whipped cream and sprinkle with nutmeg.
  • Makes about ten ½ cup servings.

Apple Pie

Apple Pie

I’m finicky about apple pie. No canned filling. No tart apples. No nutmeg or ginger. No half-baked, slightly crunchy apples. I just want soft sweet cinnamon goodness with a decent flaky crust!

That’s why I rarely eat someone else’s apple pie. Even if it appears homemade, there could be odd spices lurking inside. 😄 I’ve been fooled too many times to take a chance. I’d rather eat cherry pie.

This recipe is the only one I use for apple pie. The crust is easy and produces a reasonably flaky crust. I prefer using sweeter apples, such as Gala, Golden Delicious, Fuji, or Braeburn. I once made a pie using Granny Smith apples and hated it. 😄

Apple Pie

My favorite recipe for apple pie!
Course Dessert
Cuisine American
Keywords adult-approved, apples, fruits, holiday recipes, kid-friendly, sweet, vegetarian
Prep Time 1 hour
Cook Time 50 minutes
Servings 8
Calories 611kcal
Author Lynne

Ingredients

Crust

  • cup flour plus extra for rolling out dough
  • 1 tsp salt
  • 1 cup vegetable shortening
  • 1 egg yolk
  • ~⅔ cup milk

Filling

  • 6 – 8 apples Braeburn, Fuji, Gala, or Golden Delicious
  • ¼ cup flour
  • 1 tsp cinnamon
  • 1 cup sugar

Topping

  • 1 egg white
  • 1 tbl sugar

Directions

Filling

  • Peel, core, and slice apples into large bowl.
  • In a small bowl or cup, mix cinnamon, sugar, and ¼ cup flour. Pour onto apples and toss until apples are coated. Set apples aside while making the crust.

Crust

  • Mix flour and salt together. Add shortening and cut in using a fork, two knives, your hands, food processor, or a mixer until mixture is crumbly.
  • Drop the egg yolk (reserve the egg white for later) into a measuring cup and beat slightly. Add milk to egg until it measures ⅔ cup.
  • Pour milk into flour mixture, stirring until completely moistened and it forms a dough. Do not overwork the dough; the more it's handled, the tougher the crust will be when baked. Divide dough almost in half, leaving one slightly larger than the other.

Bottom Crust

  • Sprinkle flour onto a clean, dry, flat surface and rub a rolling pin with flour. Roll out the larger dough half into a circle. If the dough sticks, sprinkle with more flour, but not too much, as this will also create a tougher baked crust. The circle should measure two inches larger in diameter than the top of your pie pan. (About 11 inches for a 9" pan; 10 inches for an 8" pan.)
  • Carefully roll dough up as if for cinnamon rolls, but keeping it loose. Lift rolled dough onto edge of pie plate and carefully unroll onto the rest of the pan. Press into bottom and sides of pan, patching any tears as needed. Trim edge, leaving at least ½ inch dough overlapping the pan's edge.
  • Fill bottom crust with the prepared apple slices. The filling should be flush or slightly higher than the edge of the pan. Make sure the slices are lying flat.

Top Crust

  • Roll out second half of dough using the same method as the bottom crust. Once again, loosely roll up circle of dough to make it easier to transfer to the pie plate. Once it's centered on the apples, trim it to the same ½ inch as the bottom crust.
  • Press pie crust edges together, fold it over once, and crimp all the way around.

Topping

  • Slightly whisk remaining egg white. Use a pastry brush to brush the egg white onto the top crust, just enough to wet the crust. (Discard any leftover egg white.)
  • Sprinkle crust with a tablespoon of sugar.
  • Bake in a 375°F oven for 50 minutes, or until apples are tender.

Pumpkin Spiced Latte

Pumpkin Spiced Latte

Pumpkin Spiced Latte

A quick and easy version of this popular drink!
Course Breakfast, Drinks
Cuisine American
Keywords coffee, latte, pumpkin
Prep Time 2 minutes
Cook Time 20 minutes
Servings 2
Calories 207kcal
Author Lynne

Ingredients

  • cups milk
  • tsp  pumpkin spice extract
  • 2 tsp  pure vanilla extract
  • 2 tsp  sugar or sugar substitute (to taste)
  • ¼ cup espresso or ½ cup strong brewed coffee
  • whipped cream
  • cinnamon

Directions

  • In a small pan combine milk, pumpkin spice extract, vanilla and cook on medium heat, whisking until boiling.
  • Remove from heat.  Pour into two mugs, add the hot espresso or coffee, and top with whipped cream. Sprinkle with cinnamon, if desired.
Huitlacoche Quesadillas

Huitlacoche Quesadillas

This summer we were looking forward to fresh corn on the cob straight from our garden. Unfortunately, our corn didn’t grow any taller than me and the ears remained small and underdeveloped.

We didn’t harvest any. And now the stalks have shriveled and died.

My only consolation is that our neighbor—who always plants a big garden—had similar issues with his corn, so it wasn’t my lack of expertise that produced such a sorry crop.

Our corn did produce one thing, though:

Smut.
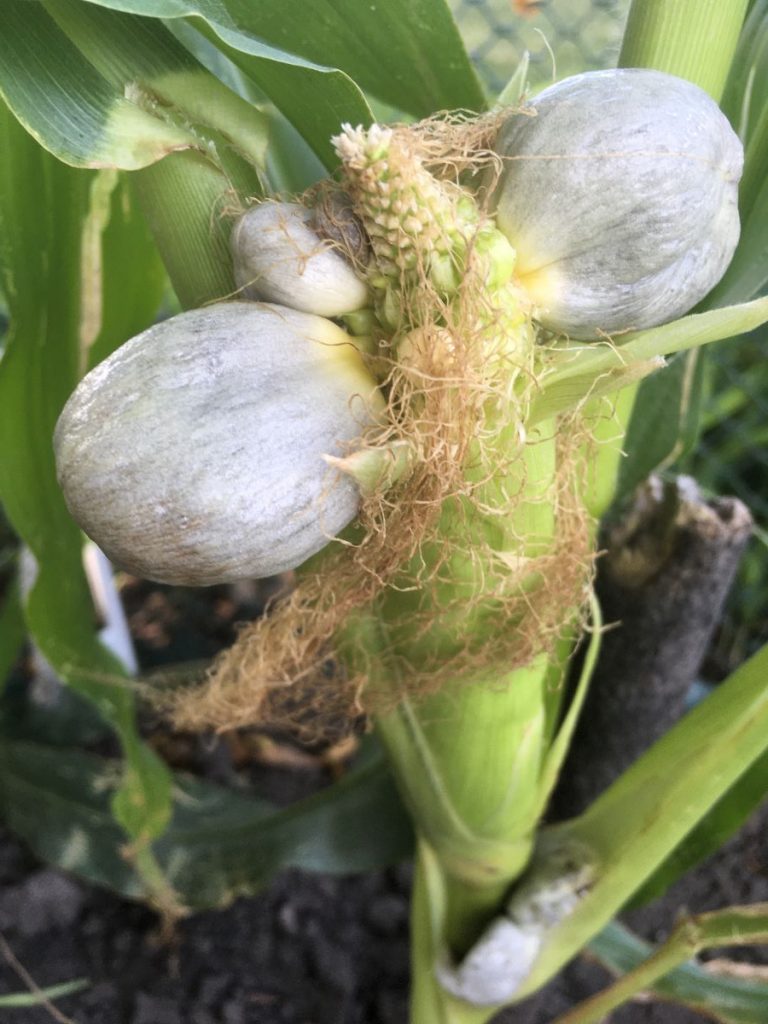
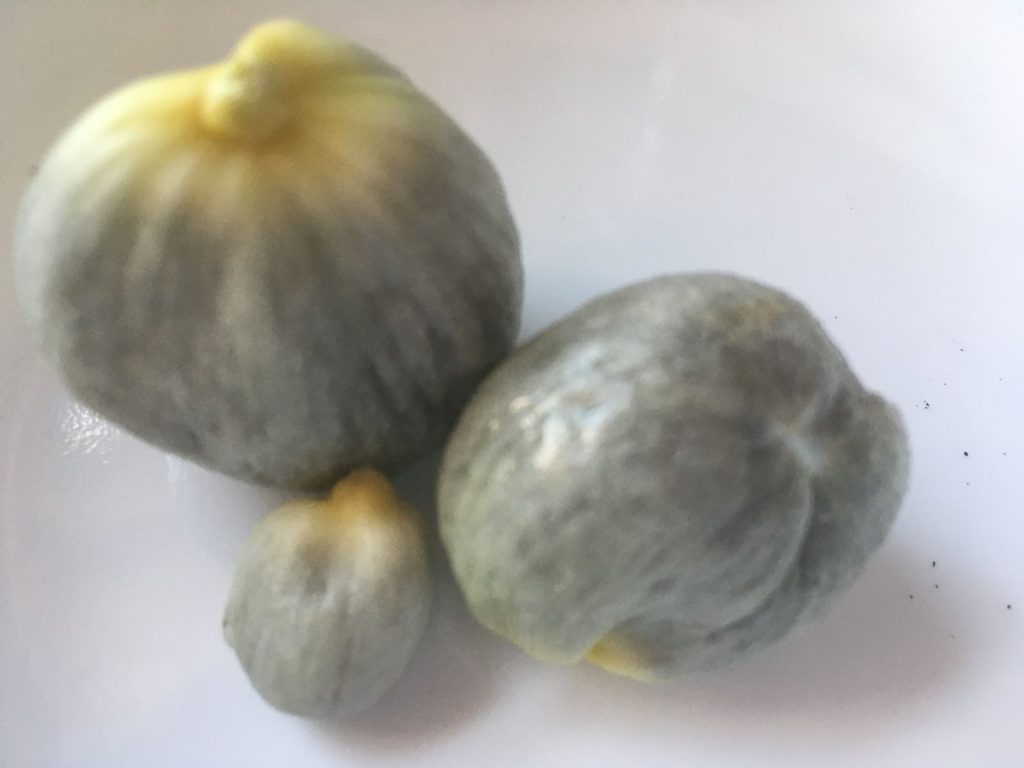
Corn smut, also called corn truffle or corn mushroom, is a fungus which grows on ears of corn.

In the U.S., it’s a blight that farmers want to avoid.

In Mexico, it’s called huitlacoche (weet-luh-koe-chei) and is considered a delicacy.

My first reaction when I saw a couple ears of corn had gotten infected was disgust, then disappointment that two ears of corn were definitely ruined.

Then I remembered the delicacy aspect and wondered if I should try it.

After all, I’m up for trying new foods, like the ones I had this summer:
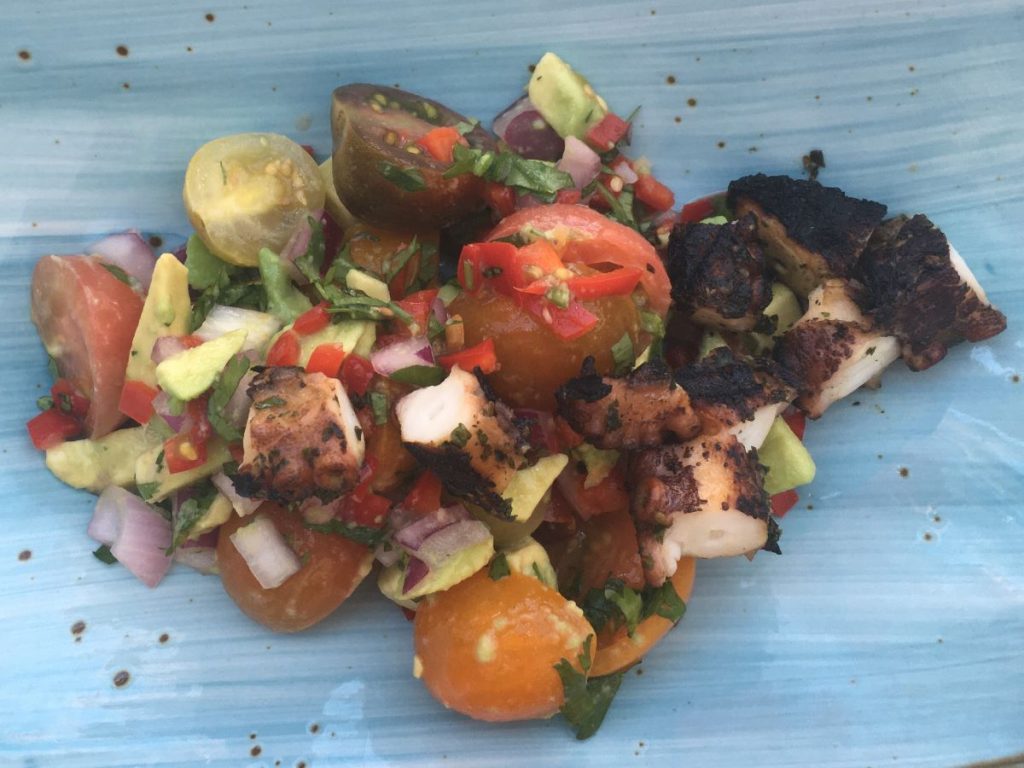
So I found a recipe for huitlacoche quesadillas, and harvested the corn smut. 

wasn’t brave enough to taste an corn truffle by itself. I waited until I’d made the filling for the quesadillas. That was a mistake, because by then all I could taste was the garlic. 😄 I suspect they taste more like mushrooms if eaten plain. 

In the end, I thought the huitlacoche quesadillas tasted fine, but I doubt I’ll make them again. I had filling left over and ended up using it as salsa for tacos. (Fried flour tortillas, seasoned hamburger, & cheese.) Now that was delicious!

If I ever (accidentally) grow corn truffles again I’ll make the recipe as a salsa for my tacos.

A couple weeks afterward, I excitedly told my friend—who is of Mexican descent—about my experiment with this delicacy. She’d never even heard of huitlacoche. 😂😂😂

Huitlacoche Quesadillas

Try this Mexican delicacy in your quesadillas!
Course Main Course, Side Dish
Cuisine Mexican
Keywords adult-approved, dairy-free, easy, gluten-free, quick, salsa, vegan, vegetarian
Prep Time 30 minutes
Cook Time 20 minutes
Servings 4
Calories 390kcal
Author Lynne

Ingredients

  • 2 large tomatoes
  • ½ medium onion
  • 1 clove garlic
  • 12 oz huitlacoche
  • 2 tbl canola or vegetable oil
  • 8 corn tortillas
  • 12 oz shredded cheese of your choice

Directions

  • Chop the huitlacoche, onion, tomatoes, and garlic.
  • In a small saucepan, saute the huitlacoche in 1 tbl oil over medium heat for about 10 minutes. Transfer to a bowl.
  • Add 1 tbl oil to pan and saute the onion, tomatoes and garlic, stirring frequently, until the onion is translucent, about 5 minutes. Add to huitlacoche and stir until well mixed.
  • Heat a skillet over medium heat. Place corn tortilla in pan and sprinkle half with cheese. Spoon huitlacoche mixture onto cheese, then sprinkle with more cheese, keeping it all on only half the tortilla. Using a spatula, fold tortilla over.
  • When the bottom is turning golden and the cheese has melted, flip and cook on the other side. Remove from heat and repeat with remaining tortillas.
  • Serve with your favorite salsa.

Notes

The filling can also be used as a salsa for tacos.
Green Bean Amandine

Green Bean Amandine

Every year Monte’s company Christmas party features a catered meal that includes a great green bean dish. This recipe is really close to that.

Green Bean Amandine

Garlic and almonds punch up the flavor of green beans in this tasty dish.
Course Side Dish
Cuisine American
Keywords adult-approved, dairy-free, easy, gluten-free, quick, vegan, vegetables, vegetarian
Prep Time 10 minutes
Cook Time 20 minutes
Servings 4 servings
Calories 125kcal
Author Lynne

Ingredients

  • 1 lb fresh green beans
  • ¼ cup blanched slivered almonds
  • 2 tbl butter or margarine
  • 2 cloves garlic, minced or put through a garlic press
  • salt, to taste

Directions

  • Wash beans and trim ends if needed.
  • Place in a microwave-safe dish with ⅓ cup water. Microwave 10 minutes or until crisp-tender.
  • In the meantime, heat a medium-sized saucepan on medium heat. Add almonds to dry pan and toast until just starting to turn golden, stirring often.
  • Reduce heat and add butter, stirring until melted. Add garlic and saute till fragrant, about 30 seconds.
  • Drain green beans and add to almonds. Season with desired amount of salt. Stir till heated through.

Spicy Sticky Pork

Spicy Sticky Pork

I found this recipe when searching for one to use leftover pork loin. It quickly became one of our favorites. The original recipe didn’t call for vegetables, but it seemed an obvious addition. Now when I make pork chops or pork loin, I always make a little extra so I can use the leftovers for this recipe. 🙂

Spicy Sticky Pork

A sweet gingery and garlicky stir-fry.
Course Main Course
Cuisine American
Keywords adult-approved, dairy-free, easy, peppers, spicy, sweet
Prep Time 30 minutes
Cook Time 30 minutes
Servings 4
Calories 493kcal
Author Lynne

Ingredients

  • lbs pork loin or chops, cut into small strips. either raw or leftover cooked pork
  • ½ tsp black pepper
  • salt to taste
  • 2 tbl canola oil
  • 2 cloves garlic, minced or put through a garlic press
  • 2 tbl grated fresh ginger
  • 1 cup honey
  • ¼ – ½ cup chili garlic sauce depending how spicy hot you want it
  • 1 tbl rice wine vinegar
  • 2 cups vegetables of choice, such as bell peppers, snow peas, frozen peas, broccoli, carrots, onions, and/or mushrooms

Directions

  • Heat oil in skillet over medium heat.
  • If using raw pork, toss with salt & pepper and add to oil. Saute until no longer pink. Work in batches if needed to avoid overcrowding the pan. Transfer cooked pork to a bowl and set aside.
  • Saute garlic and ginger until fragrant, about 30 seconds. (Add salt & pepper here if using unseasoned leftover pork.) Stir in honey, chili garlic sauce, and vinegar.
  • Add vegetables and simmer until they're crisp-tender, stirring frequently. Add pork and stir to coat all. Continue to simmer until sauce is reduced to a thick, sticky glaze.
  • Serve over rice or noodles.
Italian Herb Bread

Italian Herb Bread

So good you can’t stop with just one slice!

Pancakes

Pancakes

These flavorful pancakes are light and fluffy.

Peanut Butter Cookies

Peanut Butter Cookies

When Gem’s friend told me about this recipe I didn’t believe her. Cookies with only three ingredients? Without flour? But I did a quick search online and discovered it was true. The girls mixed up a batch and walked around town, selling them to the neighbors.

If you use sugar-free peanut butter and substitute Stevia, these gluten-free cookies will also be sugar-free! It’s too bad peanut butter itself is so high calorie. 😄

Peanut Butter Cookies

Use just three ingredients in these gluten-free cookies!
Course Dessert
Cuisine American
Keywords adult-approved, easy, gluten-free, kid-friendly, quick
Prep Time 10 minutes
Cook Time 10 minutes
Servings 24
Calories 164kcal
Author Lynne

Equipment

  • Cookie sheet

Ingredients

  • 2 cups peanut butter creamy or crunchy, regular or sugar-free
  • 1 cup sugar or Stevia artificial sweetener
  • 2 large eggs

Directions

  • Preheat oven to 350°F. Line a cookie sheet with aluminum foil or parchment paper.
  • Mix the three ingredients by hand. (Using a mixer causes the oil from the peanut butter to separate out too much.) Mix until well-blended.
  • Drop by spoonfuls on cookie sheet. Press each cookie with a fork to flatten them, making a criss-cross pattern.
  • Bake for 8-10 minutes. Remove from oven (cookies will still be soft) and let cool on cookie sheet.
    Note: If using artificial sweetener, cookies will be very fragile and crumbly.
  • Makes 24 cookies.
Pumpkin Cupcakes

Pumpkin Cupcakes

When I found this recipe in Relish magazine, I knew it would be the perfect way to use up a can of pumpkin languishing in my cupboard. I enlisted Gem to help, and she was excited at the prospect of cupcakes. Until she heard they were pumpkin. Then she refused to help. However, she relented after some threats of banning her from electronics the rest of the day. 😄

She practically gagged at the smell of the pumpkin, but once the cinnamon was added, she agreed the batter smelled good. Then she discovered it tasted even better—both the batter and the baked cupcakes. She couldn’t even taste the disgusting pumpkin. 🤣 Now whenever she turns her nose up at something new, I remind her that she once thought pumpkin cupcakes would be awful. 😉

Pumpkin Cupcakes

Even pumpkin-haters will love these!
Course Dessert
Cuisine American
Keywords adult-approved, cake, kid-friendly, sweet
Prep Time 35 minutes
Cook Time 25 minutes
Servings 24
Calories 256kcal
Author Lynne

Equipment

  • Mixer

Ingredients

  • ½ cup butter or margarine
  • 1⅓ cups brown sugar
  • 2 large eggs
  • 1 cup canned pumpkin or cooked & mashed pumpkin
  • 1 tbl baking powder
  • ½ tsp baking soda
  • ½ tsp salt
  • 1 tsp ground cinnamon
  • ¾ cup milk
  • cups all-purpose flour
  • ¾ cup chopped walnuts or pecans optional

Directions

  • Preheat oven to 375° Insert paper liners into 24 cupcake cups.
  • Cream butter and brown sugar on medium speed until well mixed. Beat in eggs and pumpkin.
  • Blend in baking powder, baking soda, salt, and cinnamon.
  • Turn mixer on low and pour in milk. Mix until smooth.
  • Add flour one cup at a time, mixing until well-blended. Stir in nuts.
  • Spoon batter into cupcake liners, filling each about two-thirds full.
  • Bake 25 minutes or until a toothpick stuck in the center comes out clean.
  • Remove cupcakes from pans and let cool on a rack. Frost.

Cream Cheese Frosting

A versatile frosting for cakes and cupcakes.
Course Dessert
Cuisine American
Keywords adult-approved, cake, frosting, kid-friendly, sweet
Author Lynne

Equipment

  • Mixer

Ingredients

  • ¼ cup butter, room temperature
  • 8 oz cream cheese, room temperature (1 package)
  • 3 cups powdered sugar
  • 2 tsp vanilla extract
  • ¼ tsp maple or other flavoring optional

Directions

  • Cream butter and cream cheese together. Add extracts.
  • Add powdered sugar one cup at a time, continuously beating. Beat until smooth.
  • Frosts 48 cupcakes or 1 cake.
Kolaches

Kolaches

Mom often made kolaches when I was a child. They’re so yummy! As a teenager and young adult, I’d sometimes make them myself, but mine always looked like mini volcanoes, with the middle rising high and the filling leaking down the sides. Discouraged, I gave up making them.

Then I learned why my kolaches always erupted. I used grape jelly instead of pie filling! Jelly doesn’t have the weight needed to keep the middle of the roll from rising and it tends to turn to liquid in the heat. Armed with this knowledge, I always meant to try baking them again, but never did.

Until this fall. I’d invited my mother-in-law to come speak at Friendly Club, which is a small group of ladies who get together once a month to socialize and eat dessert. I was hostess that month and knew the ladies would enjoy hearing about Carrol’s recent heritage tour of the Czech Republic.

I usually serve apple crisp when I host, but thought Czech desserts would be more appropriate. And it would give me a chance to again try my hand at kolaches. I couldn’t find my mom’s recipe, so used this one instead.

I thought the addition of lemon zest sounded good. And although the kolaches were fine, I thought they could be better. I knew Carrol had taken a kolache baking class, so asked for her recipe. Once again I made them (this time to sell at our town festival) and loved them! The dough was softer and I preferred not having the lemon flavor. 😊

Kolaches

These fruit-filled rolls are one of my childhood favorite treats!
Course Dessert, Snack
Cuisine Czech, German
Keywords adult-approved, breads, breakfast, kid-friendly, sweet
Prep Time 2 hours 20 minutes
Cook Time 20 minutes
Servings 30
Calories 175kcal
Author Lynne

Equipment

  • Stand mixer with dough hook
  • Drinking glass with bottom diameter of about 2½ inches
  • Cookie sheets

Ingredients

  • cups milk
  • ½ cup canola oil
  • ½ cup granulated sugar
  • 2 large eggs
  • tsp active dry yeast or 3 packages active dry yeast
  • 1 tsp salt
  • 7 to 7½ cups all-purpose flour
  • cooking spray
  • 2 cans your choice of fruit pie filling

Directions

  • Heat milk in microwave-safe bowl till scalding. Transfer milk to mixer bowl. Use a dough hook instead of the beater for your mixer.
  • Mix in oil and sugar. Beat eggs slightly and add to mixture. Let cool to lukewarm, then mix in yeast. Let sit for 5 minutes or until the mixture is foamy. Mix in the salt.
  • Add flour a cup at a time, mixing on low speed. If dough is still very sticky after 7 cups of flour, add the remaining half cup a little at a time.
  • Dump dough onto floured rolling mat. Knead, incorporating more flour into the dough until it's smooth and elastic.
  • Spray mixer bowl with cooking spray and place the dough in it. Cover with towel or waxed paper.
  • Let rise in warm place until doubled in bulk (about 1 hour.) Punch down and let rise again. Punch down and briefly knead into ball. (Sprinkle with flour if very sticky.)
  • Preheat oven to 350°.
  • Divide dough and shape into large rolls. Place on greased cookie sheets about 4 inches apart. Dust bottom of drinking glass with flour. Press onto each roll, mashing it down and creating a large indentation in the center.
  • Fill each kolache with desired flavor of canned pie filling, such as blueberry, cherry, apple, raspberry, strawberry, mixed berry, peach, lemon, blackberry, strawberry-rhubarb, apricot, prune, poppy seed (or make your own, recipe below). Other fillings include cottage cheese, cream cheese, and streusel (recipes below.)
  • Bake at 350° until light golden brown (about 20 minutes.)

Fillings

  • When using canned fillings, you may choose to mash the fruit before filling the kolaches.
  • Sprinkle struesel topping over the main filling if desired.

Notes

Makes approximately 30 kolaches.

Nutrition analysis for blueberry kolaches:

Poppy Seed Filling

Poppy Seed Filling for Kolaches and other pastries.
Course Dessert
Cuisine Czech
Prep Time 1 hour 10 minutes
Cook Time 20 minutes
Author Lynne

Equipment

  • coffee grinder

Ingredients

  • cups poppy seeds
  • 1 can evaporated milk 12 oz
  • 3 tbl corn syrup
  • 2 or 3 tbl butter
  • ¾ cup sugar
  • 2 tbl flour (optional)
  • pinch of salt
  • 1 tsp vanilla
  • raisins (optional)

Directions

  • Grind the poppy seed in a coffee grinder. 
  • Combine poppy seed and milk in a bowl and let soak for at least one hour. If you soak and cook the seeds long enough, you won't need to use the flour.
  • If you are using the flour, mix it with the sugar and stir it into the poppy seed mix. Otherwise just add the sugar.
  • Heat in the microwave or on the stove, stirring often.  When thickened, add the syrup. Continue to heat it. Add the butter, vanilla, and the raisins if using those.

Notes

Use for kolaches.

Prune Filling

Prune filling for kolaches
Course Breakfast, Dessert
Cuisine Czech
Keywords breads, fruits
Cook Time 20 minutes
Author Lynne

Ingredients

  • 1 16 oz package pitted prunes
  • water
  • sugar to taste
  • vanilla extract to taste

Directions

  • In a microwave-safe bowl, cover the prunes with water. Cook in microwave until soft.
  • Drain the remaining liquid. Beat the prunes with a mixer. Add sugar and vanilla to taste. 

Notes

Use for filling kolaches.

Cottage Cheese Filling

Cottage cheese filling for kolaches
Course Breakfast, Dessert
Cuisine Czech
Keywords breads, fruits
Author Lynne

Ingredients

  • 2 cups cottage cheese
  • 1 large egg yolk
  • 3 tbl sugar
  • 2 tbl flour
  • salt
  • raisins optional

Directions

  • Drain the cottage cheese.  Mix in remaining ingredients.

Notes

Use for kolaches.

Cream Cheese Filling

Cream cheese filling for kolaches
Course Breakfast, Dessert
Cuisine Czech
Keywords breads
Author Lynne

Ingredients

  • 1 8 oz cream cheese
  • 3 or 4 tbl sugar
  • 1 large egg yolk
  • 1 tsp vanilla extract

Directions

  • Cream all ingredients.

Notes

Use for kolaches.

Struesel Topping

Struesel topping for kolaches.
Course Breakfast, Dessert
Cuisine Czech
Keywords breads
Author Lynne

Ingredients

  • 1 tbl butter, softened
  • 2 tbl sugar
  • 3 tbl flour

Directions

  • Mix ingredients together with a fork to make a crumb-like topping. Add more flour if needed. 

Notes

Sprinkle on kolaches after filling them and before baking.
Catalina Dressing

Catalina Dressing

I recently bought a couple bottles of regular ranch dressing because they were super cheap. Monte prefers lite or fat-free, so when he grumbled about me having bought regular, I said I’d make a homemade dressing for him instead. (Gem can eat the ranch. She uses it for chicken nuggets and fries. 😉)

I already had a recipe in mind: the Catalina dressing my mom used to make when I was a kid. Unfortunately, I couldn’t find Mom’s recipe. I don’t even remember if she had it written down or if it was in one of her cookbooks. (I checked her Better Homes & Gardens cookbook and didn’t find it there.) All I remembered was it included these three ingredients: sugar, ketchup, and celery seed.

So I found a similar recipe on AllRecipes.com and set to experimenting. It took only two tries to get it right. 😊

The original AllRecipes version called for paprika and onion powder, neither of which I have, so I immediately deleted those from my first attempt. I also swapped out the celery flakes for celery seed, since that’s what Mom used. I didn’t have red wine vinegar so I substituted rice vinegar and added a tablespoon of my brother’s home-bottled cherry wine. 😉

I kept the remaining ingredients: sugar, canola oil, ketchup, and Italian seasoning.

The first go-round tasted pretty good, though I didn’t like the Italian seasoning in it at all. Mom’s version definitely hadn’t included that. Hers was also a mite thicker and sweeter than what I’d mixed up.

We finished off that batch in record time, so when I mixed up the next version I omitted the Italian seasoning and cut the vinegar in half (but still kept the cherry wine.)

This time it was perfect! It tasted just like I remembered. I know it still isn’t exactly how Mom made it, because she would’ve used cider vinegar (or maybe white vinegar) and corn oil instead of canola. I doubt she put paprika in hers, and certainly not onion powder because I don’t recall her ever having that in her spice collection. So even if I buy those spices, I won’t use them in this recipe. One thing I know she never used was wine, since she was a teetotaler! 😄

Now I’m excited to eat salads again. I love this dressing so much I could practically drink it straight! 😄 It also tastes (almost) as good substituting Stevia sweetener for the sugar.

Catalina Dressing

Just a handful of ingredients are used to create this sweet salad dressing.
Course Salad
Cuisine American
Keywords adult-approved, quick, salad dressing
Prep Time 5 minutes
Author Lynne

Ingredients

  • ½ cup sugar or artificial sweetener, such as Stevia
  • ¼ cup rice vinegar or white vinegar
  • ½ cup canola or olive oil
  • ¼ cup ketchup
  • ½ tsp dried celery seed
  • 1 tbl red wine (optional)

Directions

  • Combine all ingredients in a lidded jar/shaker or in a blender. Shake or blend until well mixed. Or do what my Mom did: use a mixer to beat the ingredients together. Store in refrigerator.
Veggie Salsa

Veggie Salsa

A simple blend of tomatoes, peppers, and corn make the perfect accompaniment to fish.

Salmon with Pineapple Salsa

Salmon with Pineapple Salsa

A spicy pineapple salsa and wilted spinach accompany broiled salmon.

Fried Apples

Fried Apples

My mom used to make this when I was a kid. I loved it then and I love it still! Gem, however, refuses to eat it.

We always eat it just by itself or as an accompaniment to pork, but it would also taste great with vanilla ice cream.

Fried Apples

A simple, easy dessert.
Course Dessert, Side Dish
Cuisine American
Keywords adult-approved, apples, kid-friendly
Prep Time 10 minutes
Cook Time 30 minutes
Servings 4
Author Lynne

Ingredients

  • 2 tbl oil
  • 4 large apples
  • ¼ tsp cinnamon
  • 2 tbl brown sugar

Directions

  • Core and cut apples into slices. (Don't peel.)
  • Heat oil in large skillet over medium heat. Add apples and cover with lid. Stir every three minutes or so to prevent scorching. When apples are soft, add cinnamon and brown sugar. Stir till apples are coated.
  • Serve plain or with ice cream.
Sausage & Peppers

Sausage & Peppers

Hot Chicken Sausages, Bell peppers, and Tri-Color Rotini combine to make a tasty main dish.

Pizza Bites

Pizza Bites

I thought for sure my daughter would be excited about trying these. She wasn’t…

Apple Crisp

Apple Crisp

This recipe is adapted from Betty Crocker’s Cook Book for Boys and Girls. I’ve made apple crisp with oatmeal toppings, but prefer this original containing only flour, sugar, and butter. 😊 I always receive rave reviews for it. Except from Gem, who refuses to eat it.

I use a variety of apples; usually whatever is on sale. I never use Granny Smith or Red Delicious, since I dislike those. I most often use Golden Delicious, Gala, Braeburn, and Fuji. I recently tried a new variety, Ginger Gold, and that worked well. I also tried Paula Red, but they’re like Red Delicious and turn to mush when cooked.

The original recipe called for all white sugar. My mom changed it to half white, half brown. The following is a doubled recipe.

Apple Crisp

A perennial hit with my ladies' club!
Course Dessert
Cuisine American
Keywords adult-approved, apples, kid-friendly
Prep Time 1 hour
Cook Time 1 hour
Servings 16
Author Lynne

Ingredients

  • 1 cup brown sugar
  • 1 cup white sugar
  • cup flour
  • cup margarine or butter, softened
  • 8 cups peeled, sliced apples (about 8 – 10 apples)
  • 2 tsp cinnamon

Directions

  • Mix sugars, flour, and margarine together until crumbly.
  • Peel and slice apples and spread in 8″ x 13″ pan. Sprinkle with cinnamon and then spread sugar mixture on top.
  • Bake in 350° oven for 1 hour or until a knife slices easily through the apples.
  • Tastes great served with vanilla ice cream!

Tips

  • The best apples to use include Golden Delicious, Ginger Gold, Gala, Braeburn, and Fuji.
Garam Masala Chicken

Garam Masala Chicken

Garam masala is the secret ingredient for this spicy curry.

Safe Turkey Cooking Guide

Safe Turkey Cooking Guide

Turkey cooking techniques vary; some good, some bad, and some that may send your guests running for the nearest bathroom. Don’t ruin your Thanksgiving meal by accidentally poisoning your guests.